N5 CAD
Learning Intentions
Read Technical Drawings
Read technical drawings carefully and extract the necessary information so you can accurately create precise 3D models that represent part and assemblies in full detail.
Use 3D CAD Modelling Software
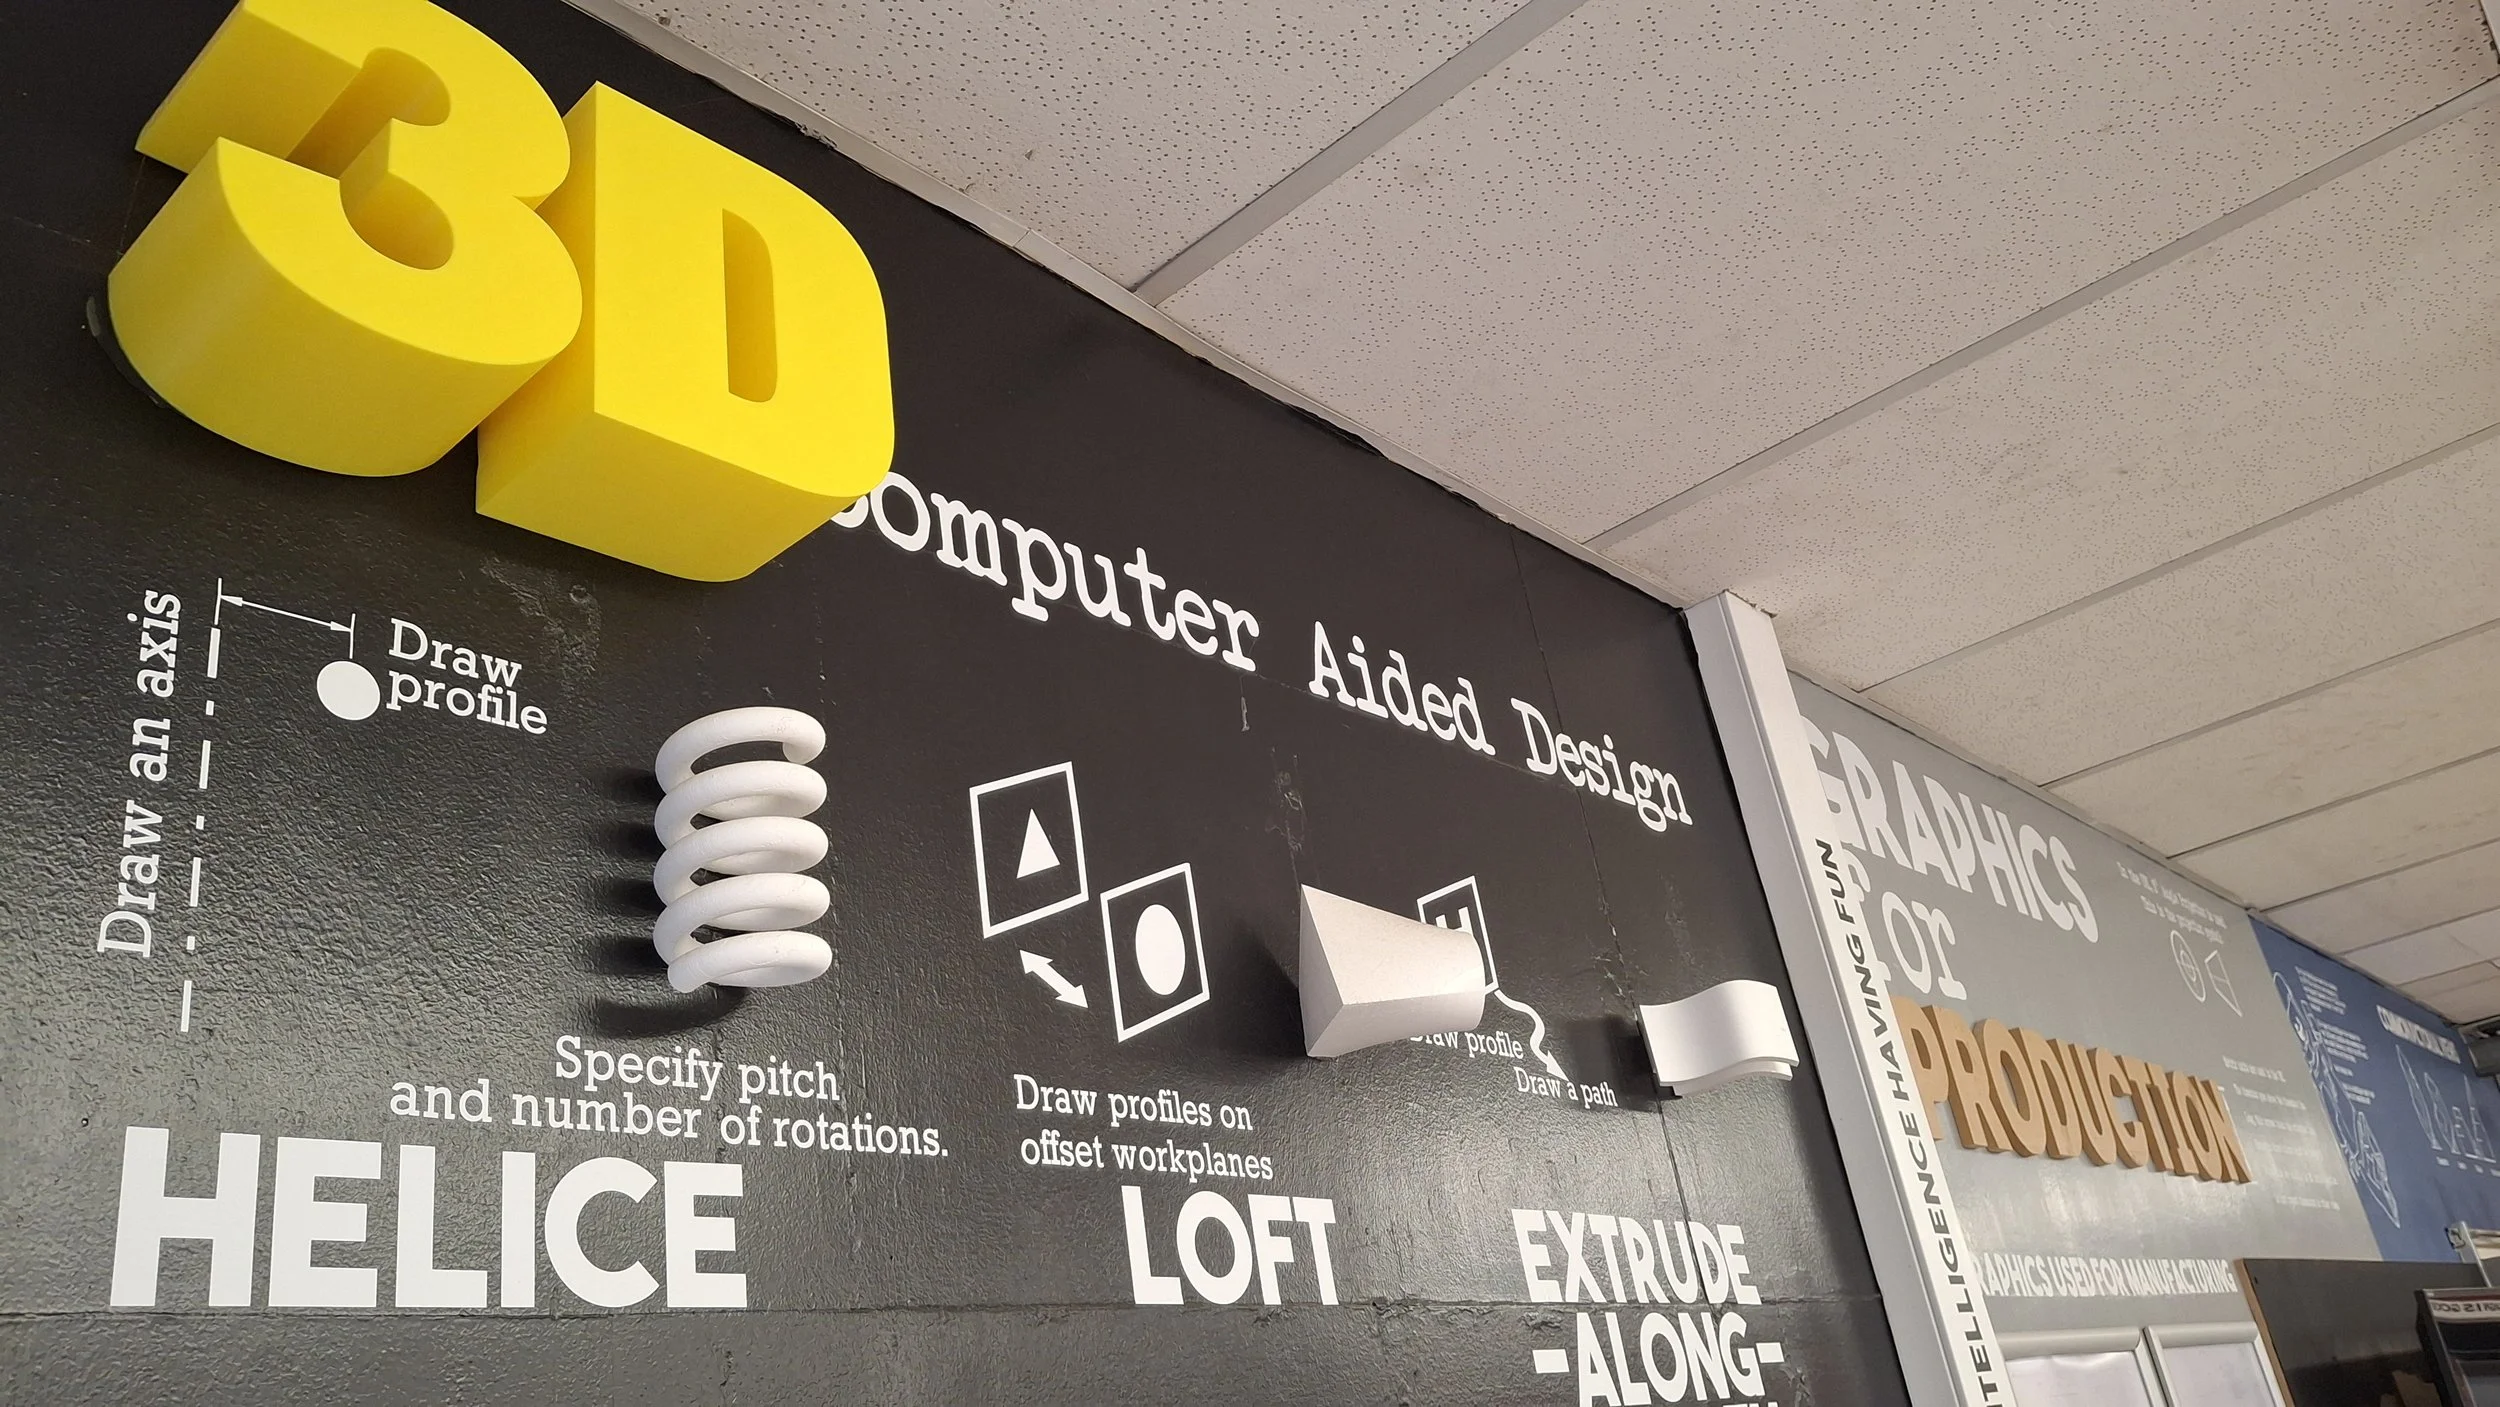
Use 3D CAD modelling software and learn core tools: Extrude and Revolve for complex shapes. Master edits such as chamfer, fillet, shell and array, plus sketch constraints, dimensioning, assemblies and basic rendering to produce accurate, manufacturable models.
Understand CAD strategies
Understand CAD strategies and adopt efficient approaches for creating 3D models more quickly.
CAD Challenges
Learning 3D CAD turns ideas into something real.
It helps you visualise, test and communicate your designs with accuracy — skills that sit at the heart of graphic and the wider world of design and engineering.
-
Making Drawings
-
Lesson 1: Layout
Phone Stand
Learn how to use a template to create your technical drawings. Including how to:
Create a base view
Create projected views
Add auxiliary views
Add a pictorial
Populate the title block
-
Lesson 2: Adding Dimensions
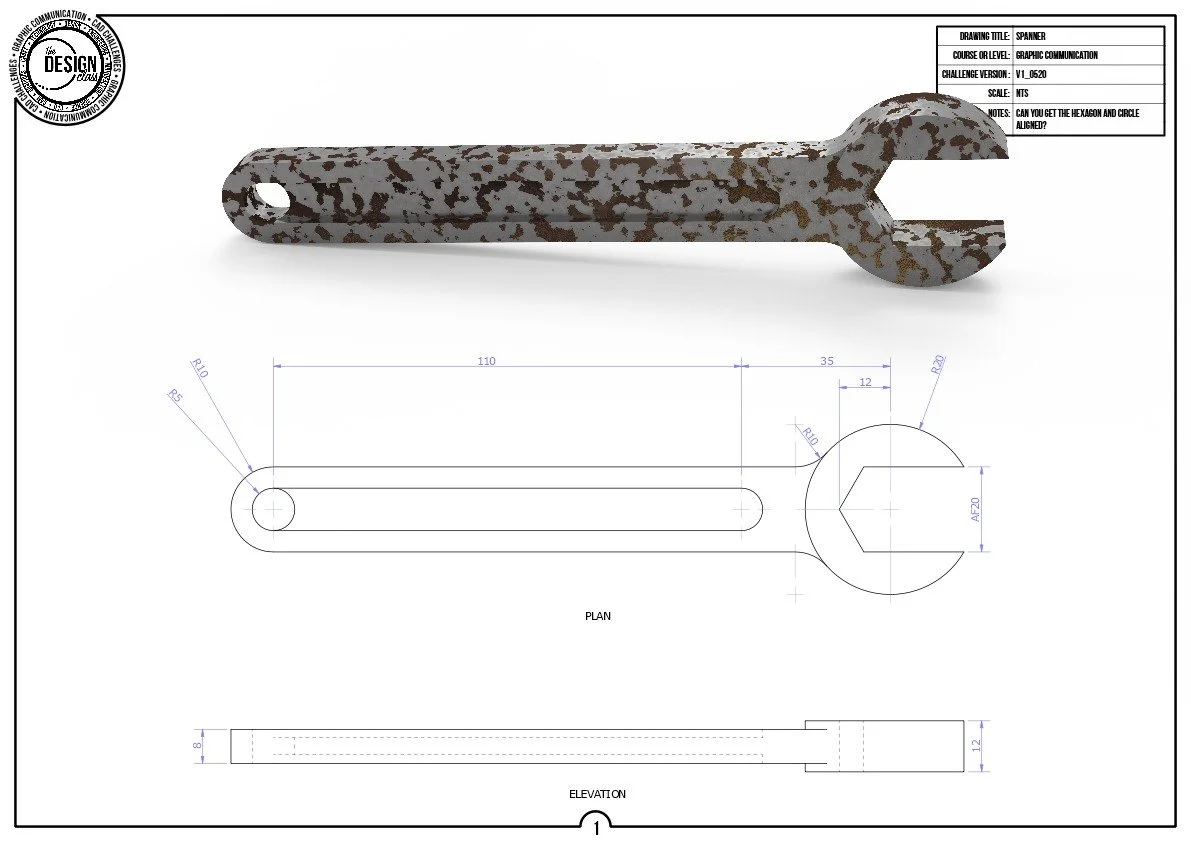
Spanner
Learn how add dimensions to a technical drawing to BS8888 standard. Specifically:
Adding centre lines
Linear dimensions
Radii and diameters
Hexagons and squares
Chamfers and angles
-
Lesson 3: Sections
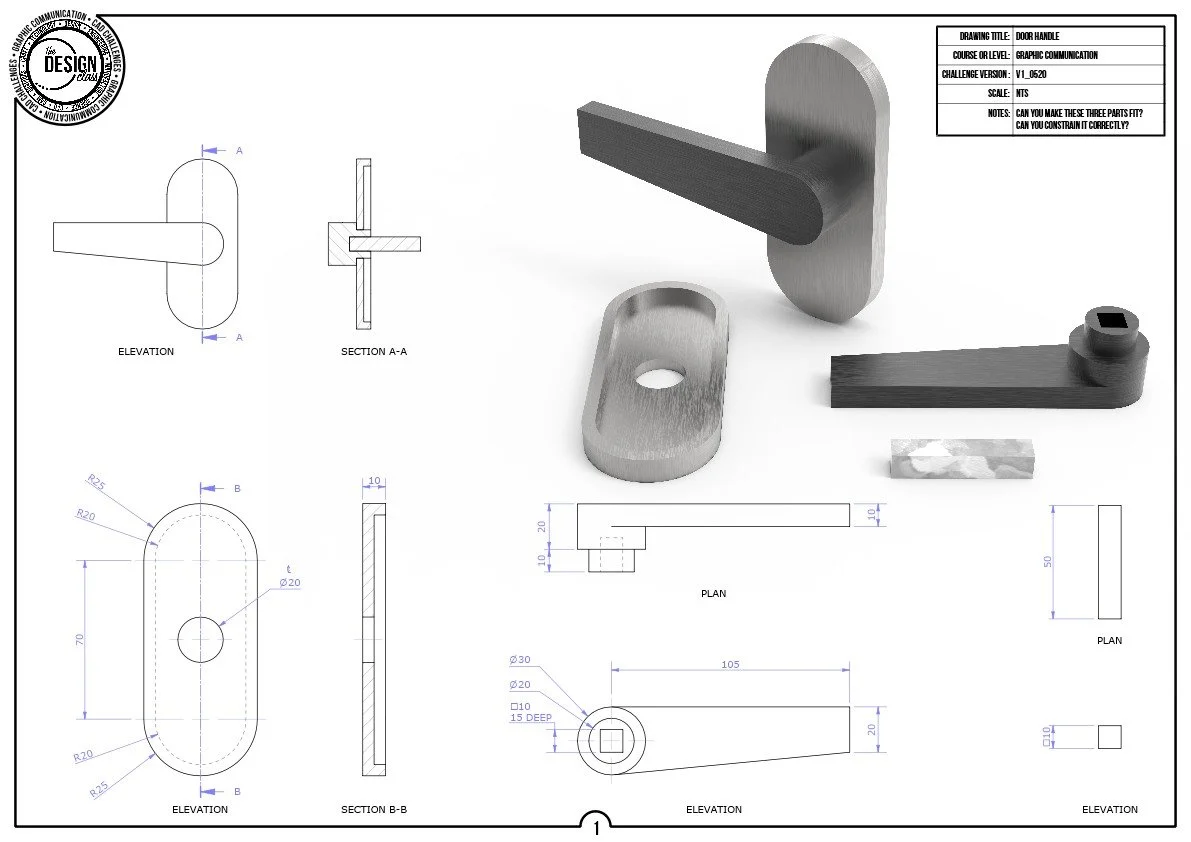
Door handle
Learn how add sectional views to a drawing. You will learn about:
Adding cutting planes
Adjusting cross-hatching
Components
Assemblies
-
Lesson 4: Exploded Views
Planter
Learn how to create an Exploded Isometric. You will learn about:
Explode an assembly
Add a view to a drawing
Create a Bill-of-Material
Add Parts Balloons
-
Lesson 5: Enlarged Views
Spirograph
Learn how add an enlarged or detailed view to a drawing.
Enlarging a feature
Selecting a scale
Turning on or off features
Annotation
-
Lesson 6: Export Drawings
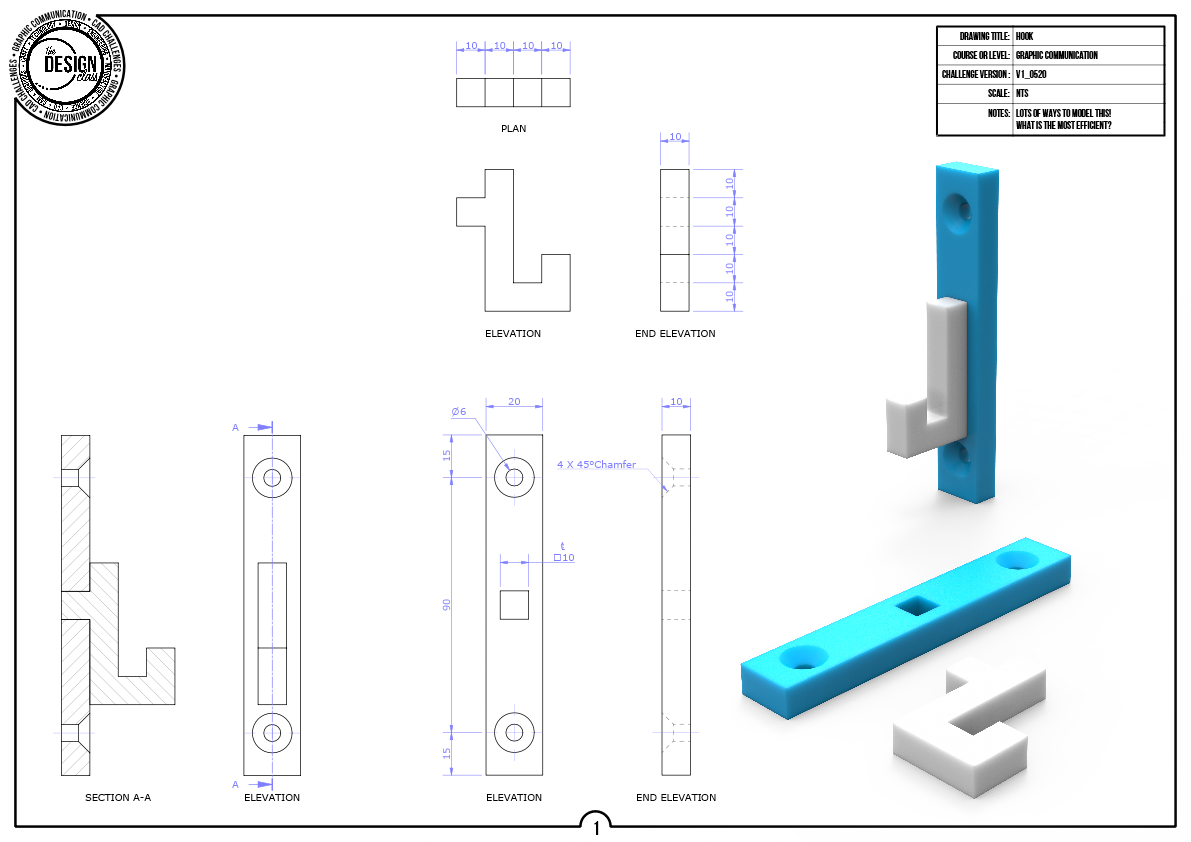
Metal hook
Learn how to export drawings for further refinement in other software.
Exporting as a PDF
Importing to other software
Adding renders
Making edits
-
-
Extrude Challenges
-
Lesson 1: Geometry
Sketching Tool
The basis of all 3D modelling is create some basic 2D geometry first… Basically, draw some shapes. However, how you draw these shapes will dictate how it becomes 3D.
Draw basic shapes
Constrain sketches
Extrude sketches
Edit sketches
-
Lesson 2: Parametrics
Box
One of the great things about 3D CAD used by engineers is that it is parametric. This means that sizes and relationships can be linked to each other, so that if one aspect changes - other areas change.
How to link sizes
How to mirror sketches and features
-
Lesson 3: E Pluribus Unum
Flower
Many products are made from more than one component, assembled together. It is possible to do this in CAD too. However, how can you make this process simple? In this tutorial you will learn:
How to make extrude different bodies
How to convert bodies to components
How to render as-you-go
-
Lesson 4: Shell or Subtract?
Desk tidy
When should you shell a model? When should you extrude-subtract? Here we look at the two methods of hollowing out a model.
Learn the Shell Tool
When to use shell or extrude-subtract
-
Lesson 5: Complex Profiles
Paperclip
Sometimes profiles are complex, and there isn’t anything we can do about it. In this lesson, we look at how we cope with complex profiles.
Tangency command
Trim Profiles
Offset Profiles
-
Lesson 6: All our skills...
Pencil Box
We have learnt a lot of skills using the extrude command. Can we bring it all together to complete this model?
Parametrics
Bodies-to-Parts
Shell
-
-
Revolve Challenges
-
Lesson 1: Learn to Spin
Pot
The Revolve command allows you to take a profile and spin it around an axis to create a 3D model. This allows you to create a whole range of different profiles that wouldn’t be possible with extrude. You will learn:
Create a profile
Create an axis
Revolve 360°
-
Lesson 2: Not all round
Phone Stand
Another phone stand… But this time using the Revolve command. Learn to rotate a profile round a specific angle. Then practice Extrude again to make the slot.
Rotate round a specific angle.
-
Lesson 3: Symmetric revolve
Coasters
Revolving profiles symmetrically around a workplane can help make complex geometry easier. In this tutorial, you will create two bodies - a stand and a coaster. You will learn:
To revolve profiles symmetrically.
Revolve to a specific angle.
Create two bodies.
-
Lesson 4: Subtracting material
Cartoon helmet
Not only can the Revolve command add material, but it can also be used to remove material. In this tutorial you will revolve a basic shape, then revolve another to subtract material. Oh, you will also learn to add a decal to a face
Add and subtract material.
Add a decal
-
Lesson 5: Angles
Funnel
Learn to revolve complex sketch geometry and use the shell tool to hollow and object and remove two faces.
Revolving complex geometry.
Shell tool to remove two faces.
-
Lesson 6: All together
Scoop
Use all your new-found skills to model this small scoop!
Revolve the scoop 180 degrees.
Revolve the handle 350 degrees.
Use the fillet tool.
-
-
Assemblies
-
Lesson 1: First Component
Toy Brick
CAD assemblies are intended to resemble how real products are put together, and help designers and engineers to visualise how something fits together.
Learn how to import components.
To orientate your first component.
Ground your first component
-
Lesson 2: Constraints
Mini-Figure
There are many tools used to assemble CAD models. These are called Constraints. The basic constraints you must know are: Mate, Align and Centre-Axis. In this lesson you will learn:
How to constrain faces of models.
How to constrain workplanes of models.
How to constrain edges of models.
-
Lesson 3: CAD Libraries
Marble Maze
The final lesson in the series - bring all our skills together to create a small toy for manufacture - a classic marble maze. This will be assembles using brass heat-insets and bolts, meaning we will use CAD library components. In this final lesson we will learn:
Make use of a CAD library.
Model a product for manufacture.
Create technical drawings for manufacture.
-
Legacy Challenges
Extrude CAD Challenges
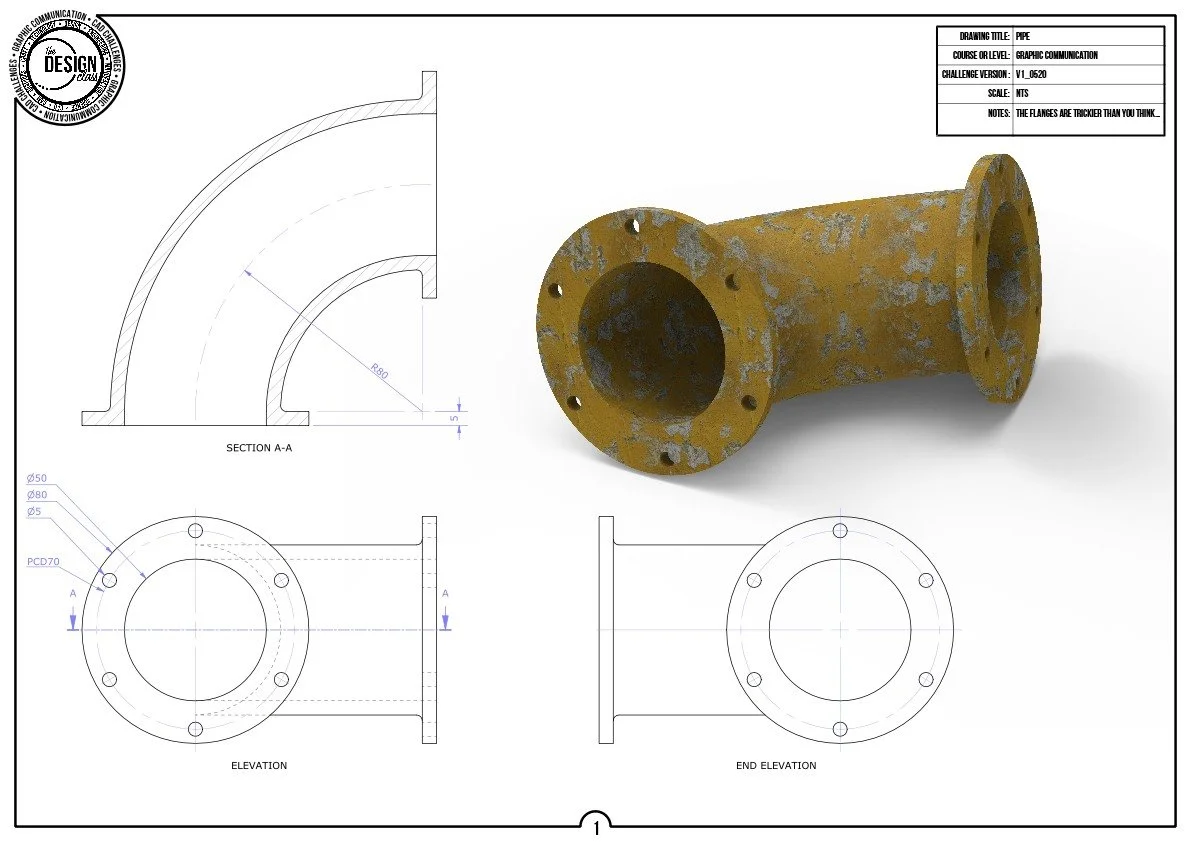
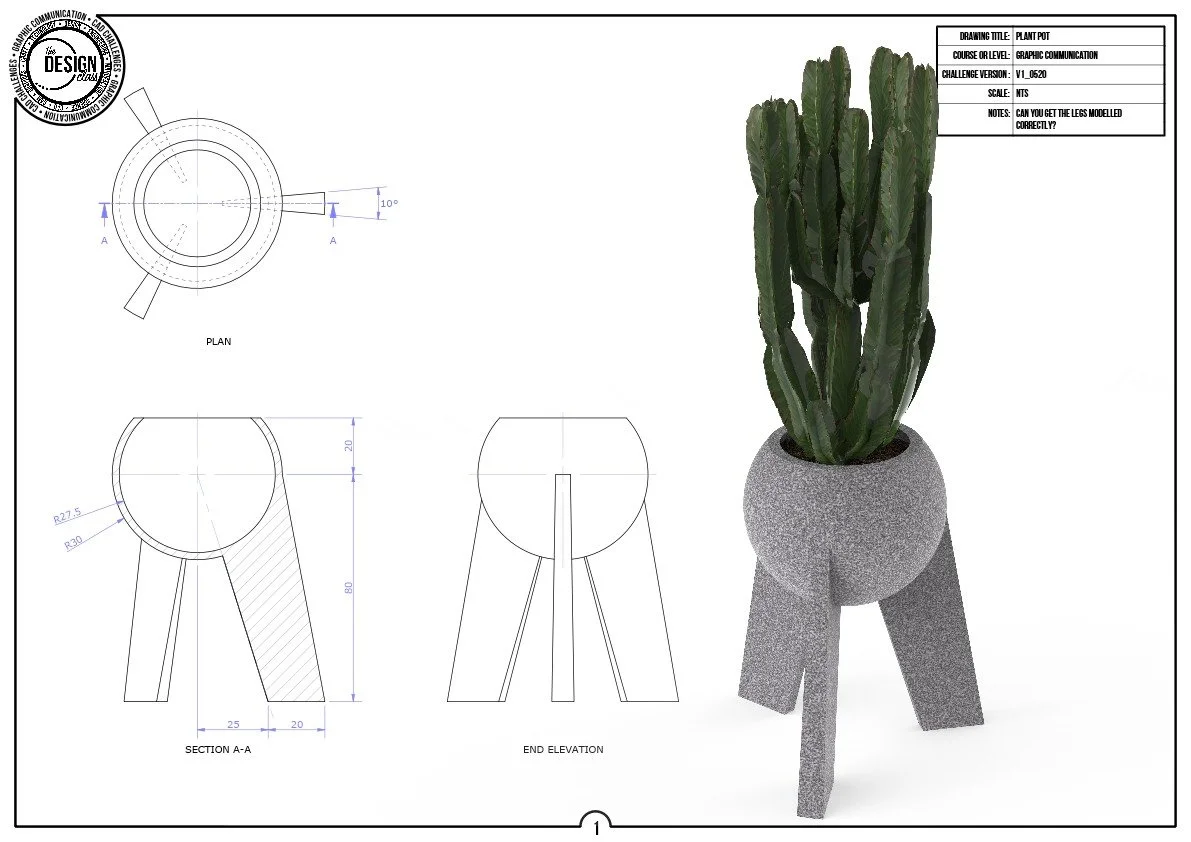
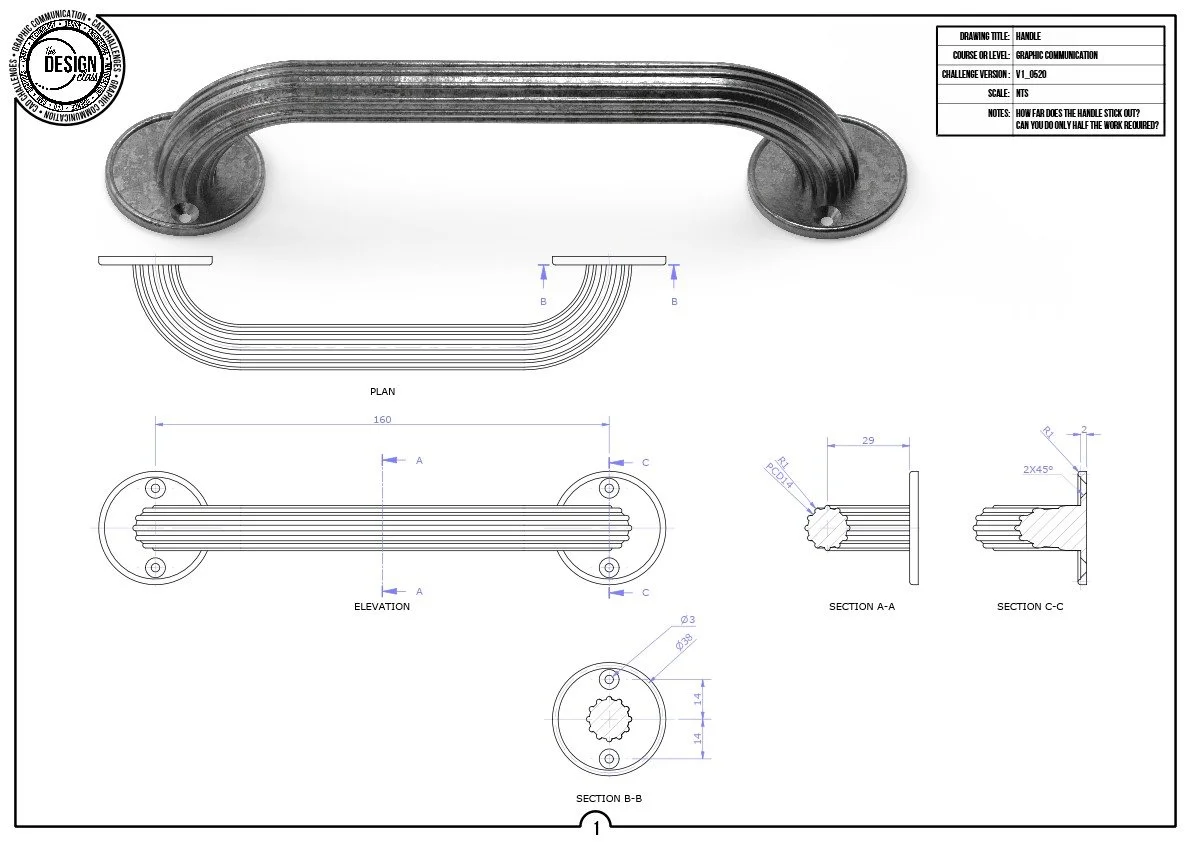
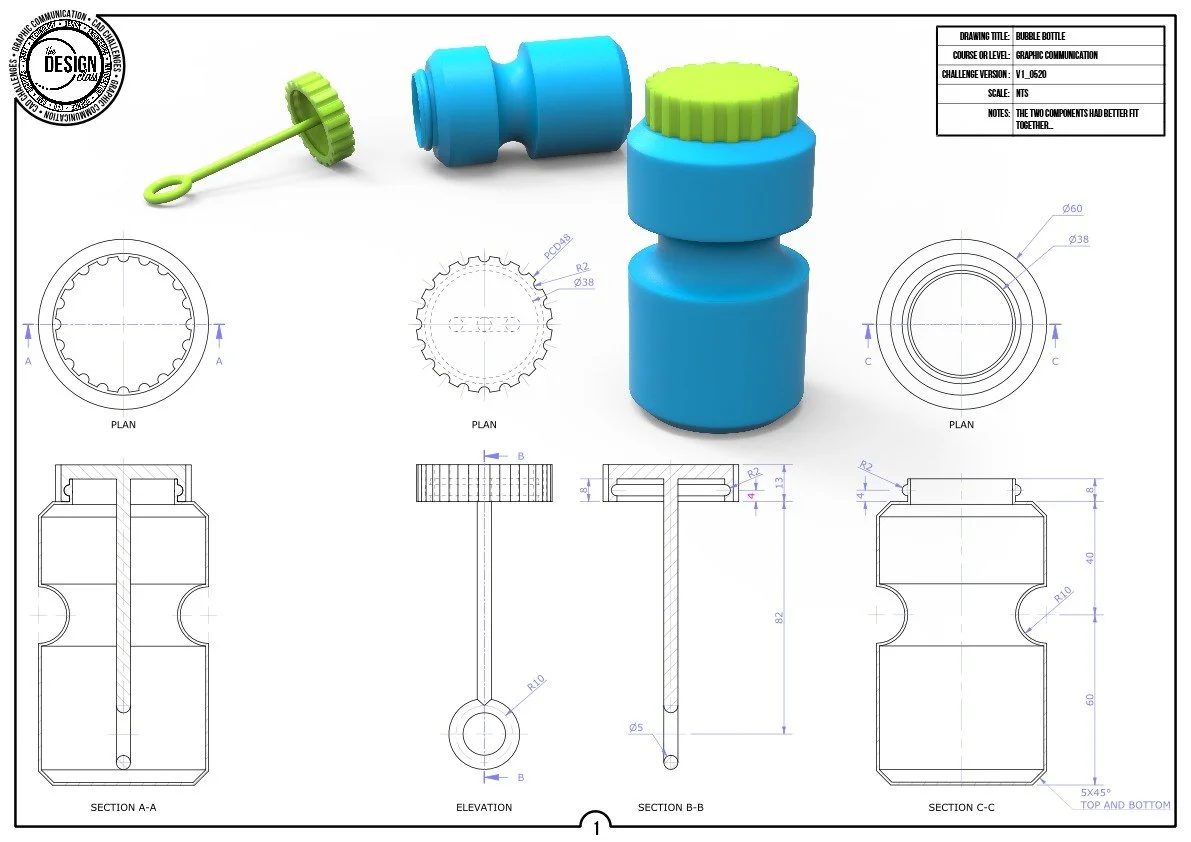
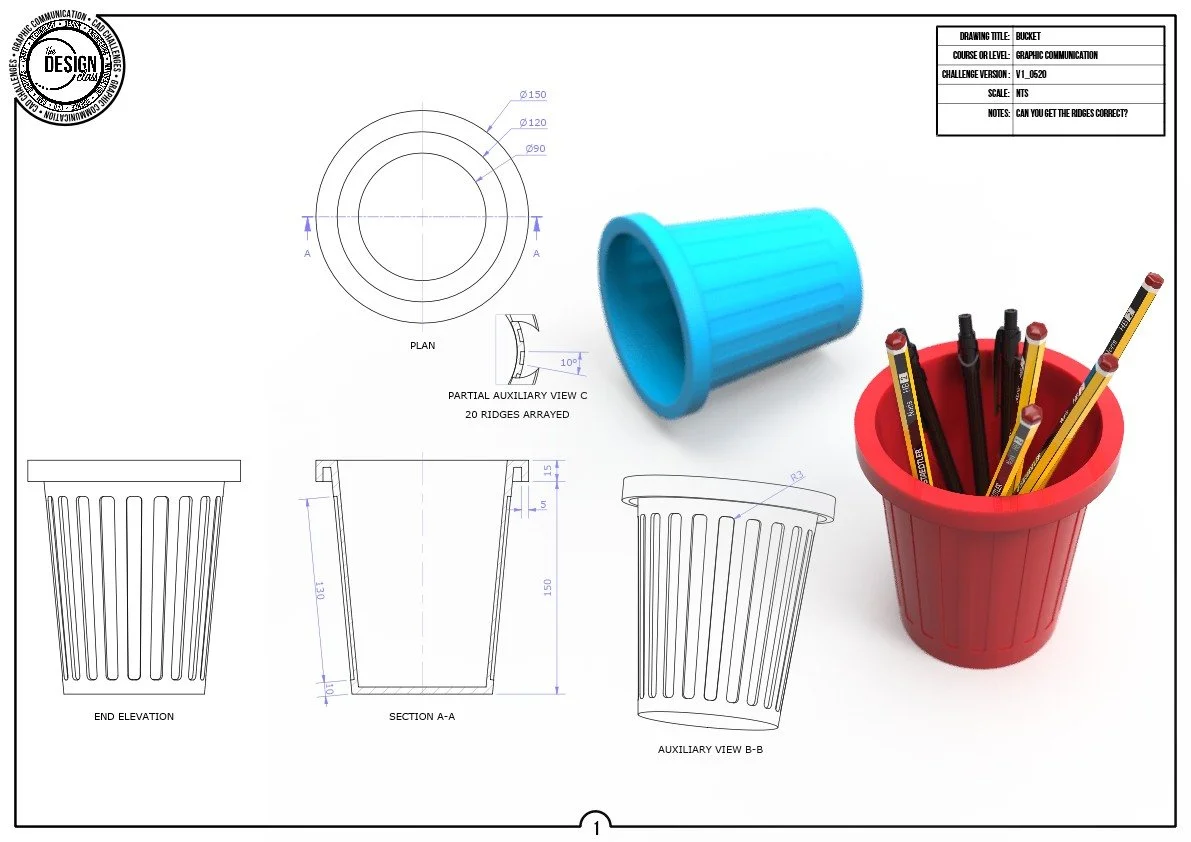
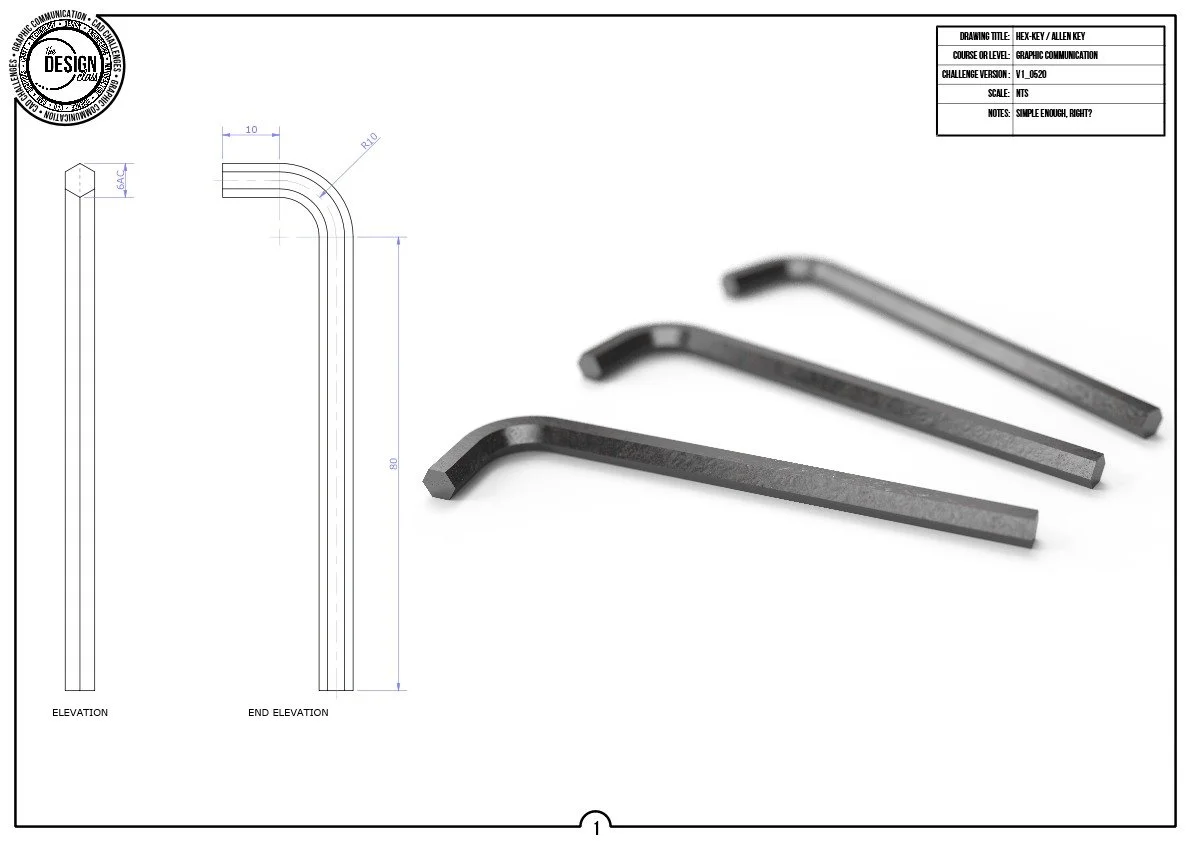
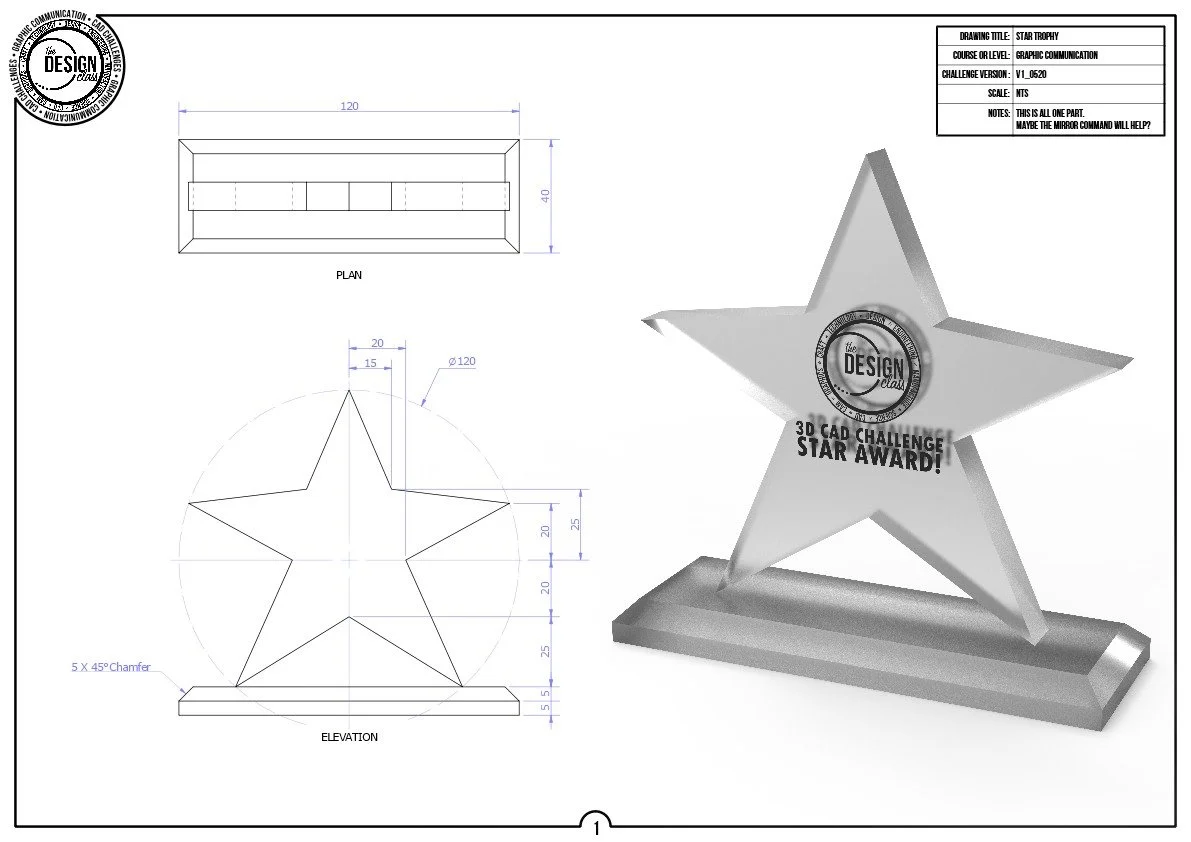
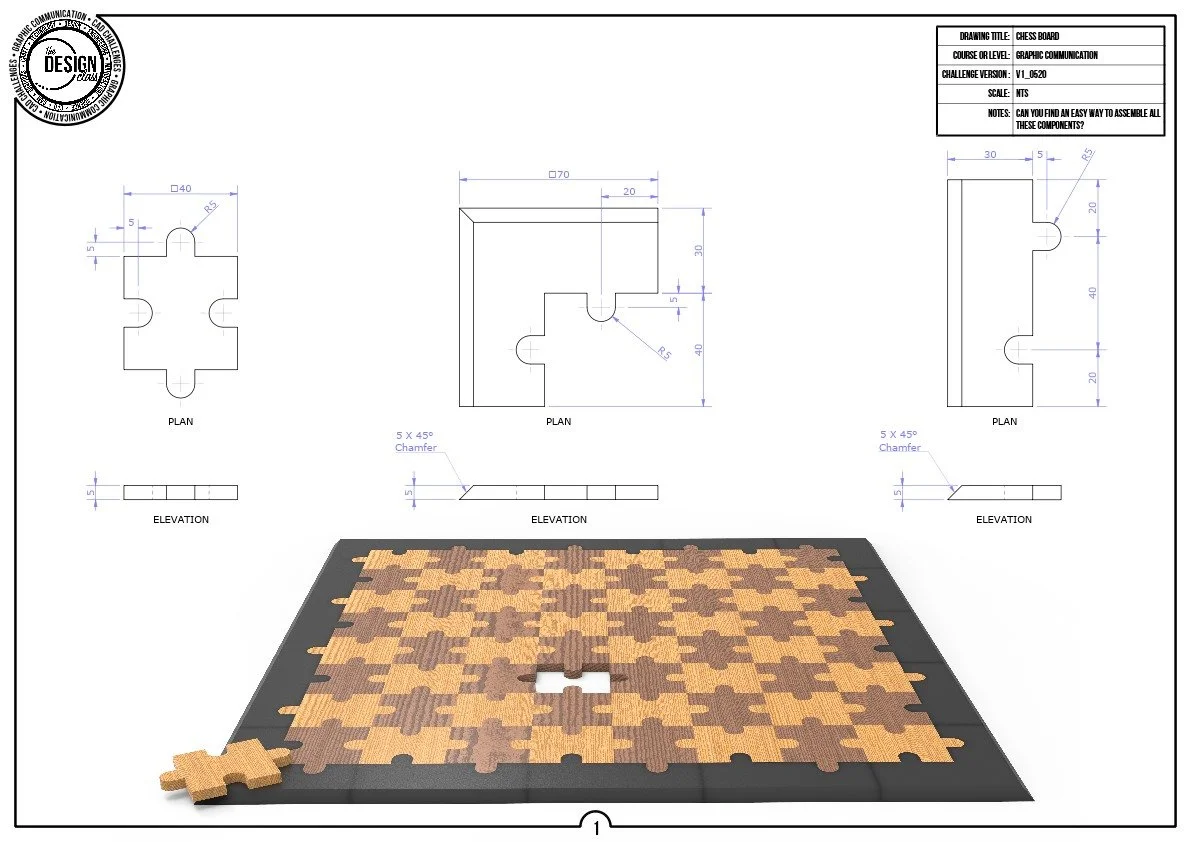
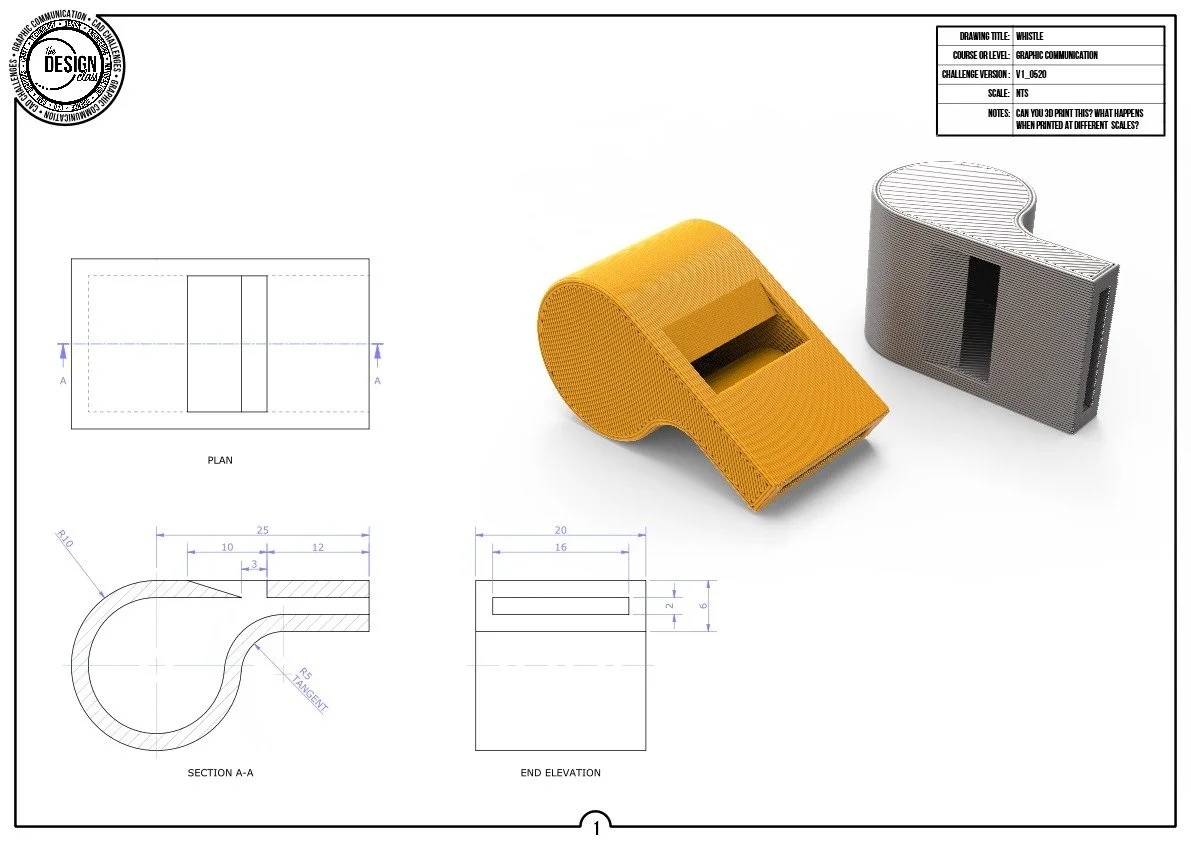
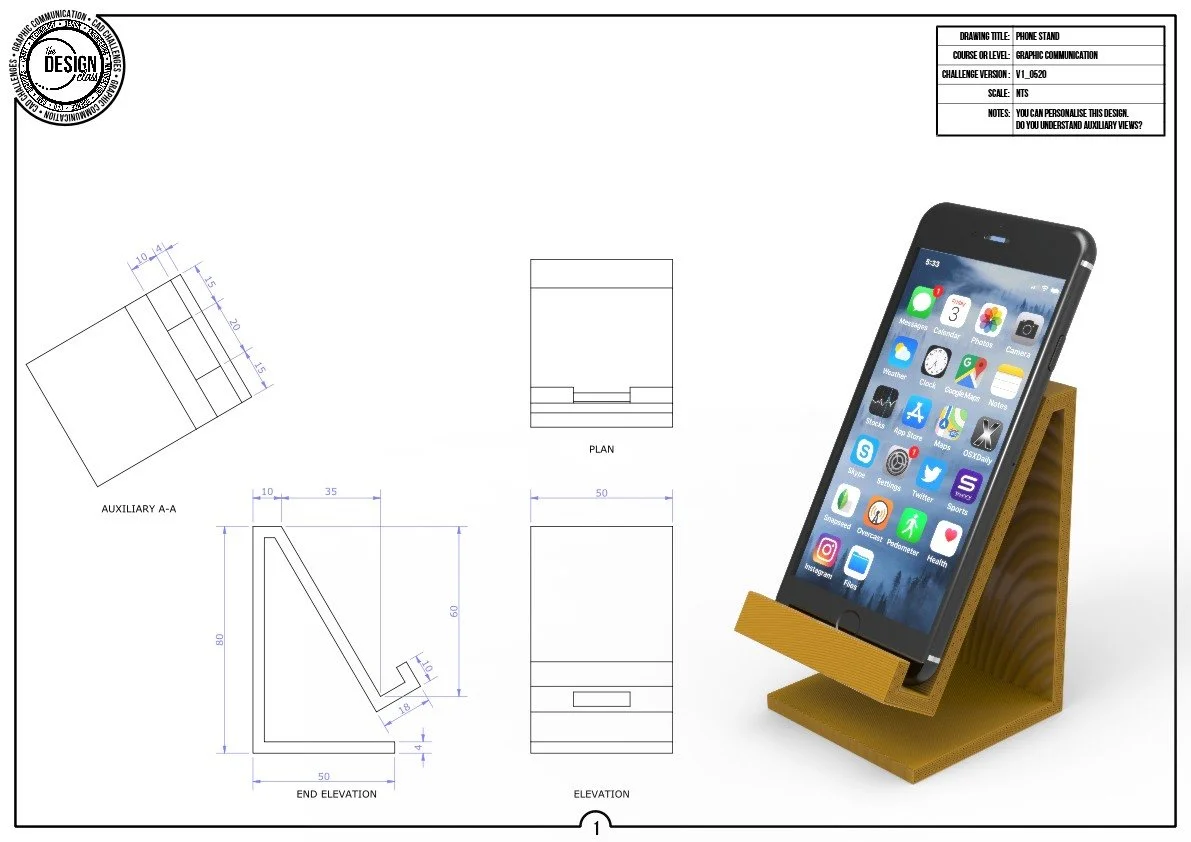
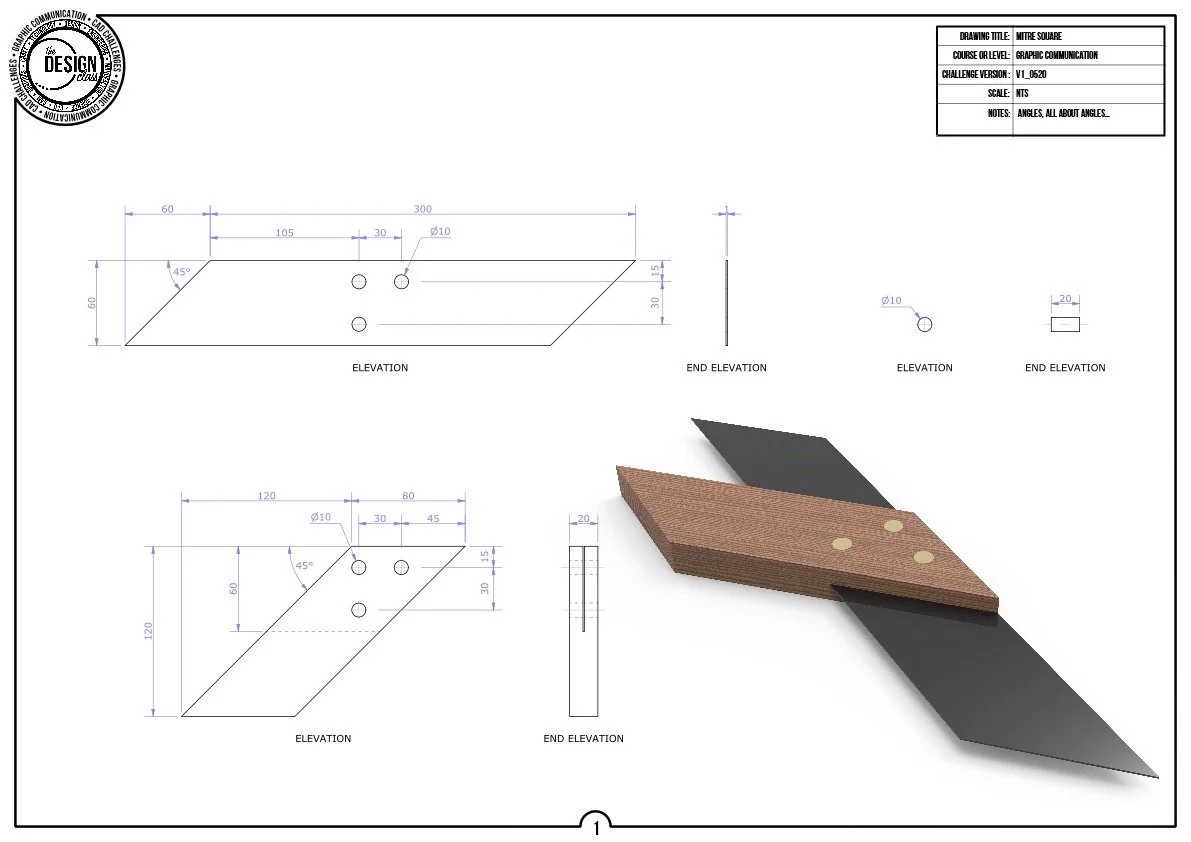
These legacy CAD challenges build confidence with the Extrude tool through purposeful, structured practice. Each model focuses on clean sketch creation, accurate dimensions, and feature use.
You recreate the objects as precisely as possible, learning how extrusion operations, profiles and directions shape a final model.
The challenges strengthen core modelling skills essential for progressing to more advanced 3D CAD techniques.
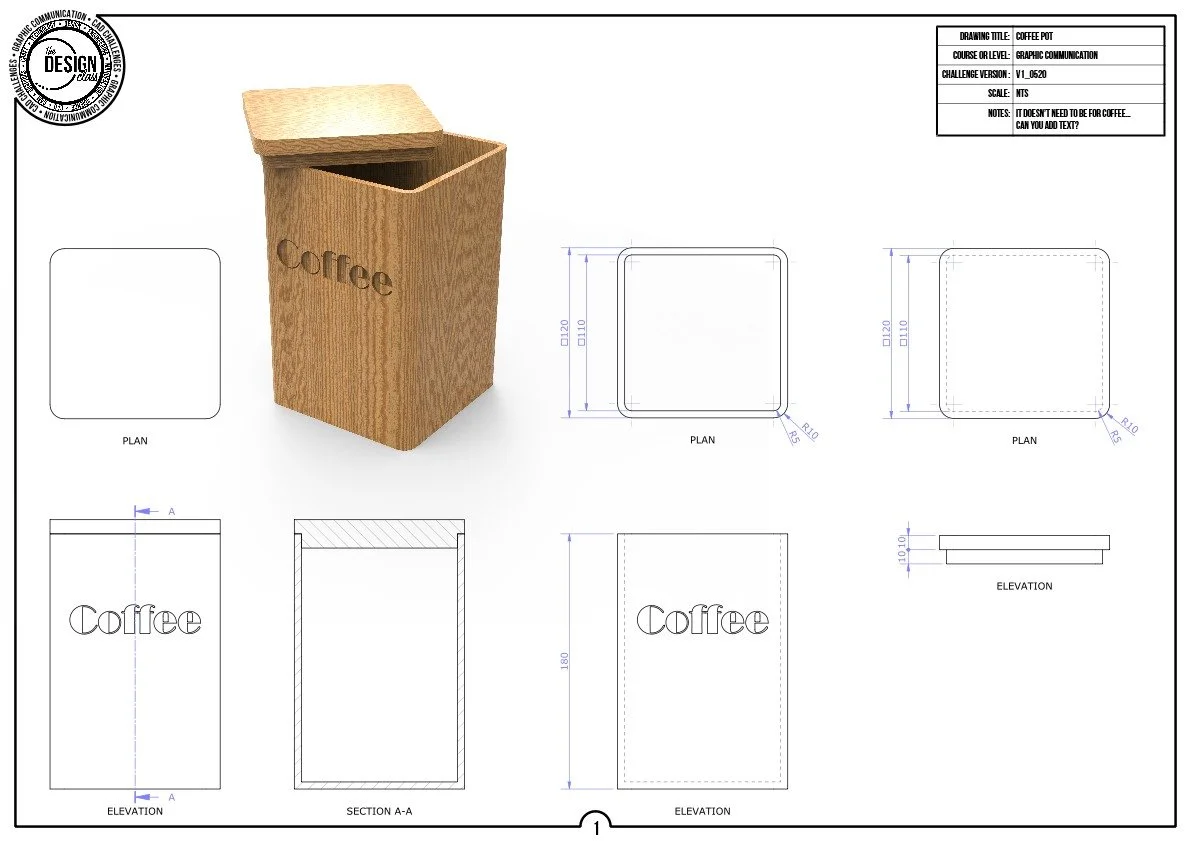
Revolve CAD Challenges
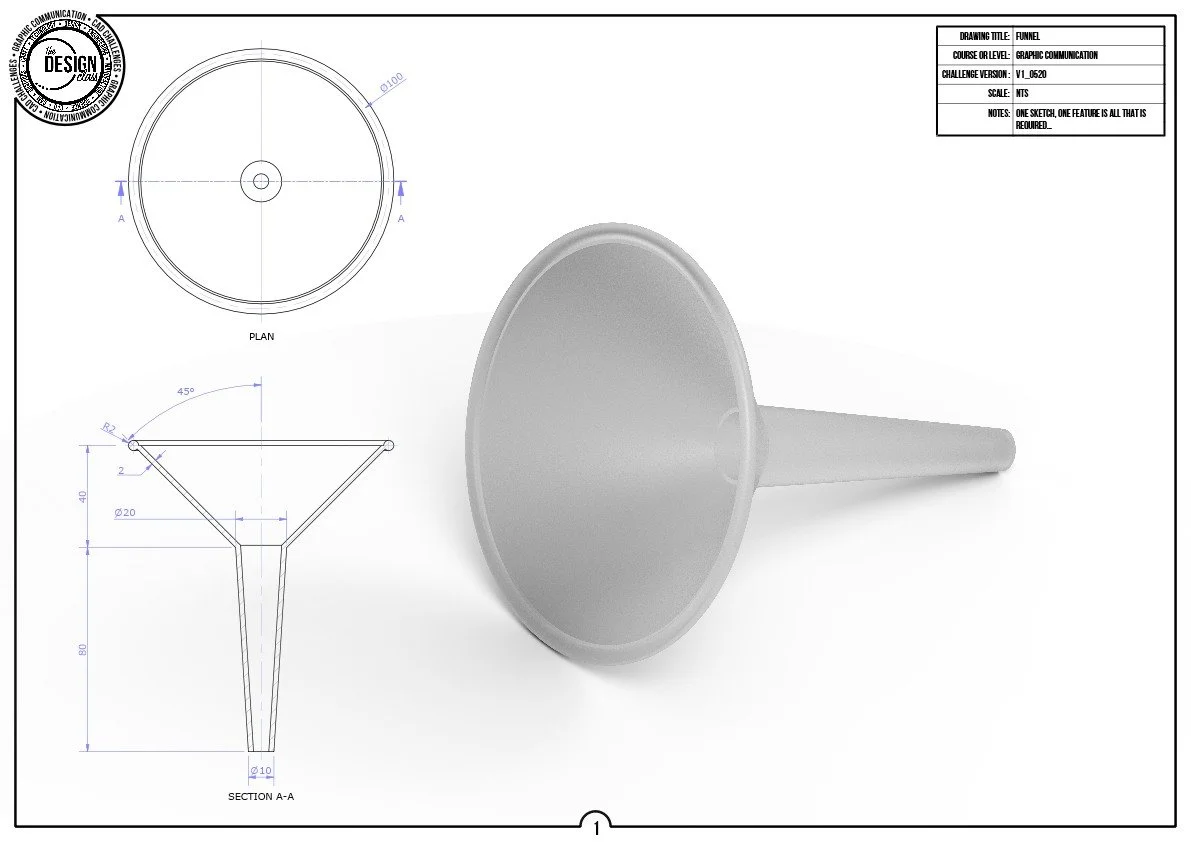
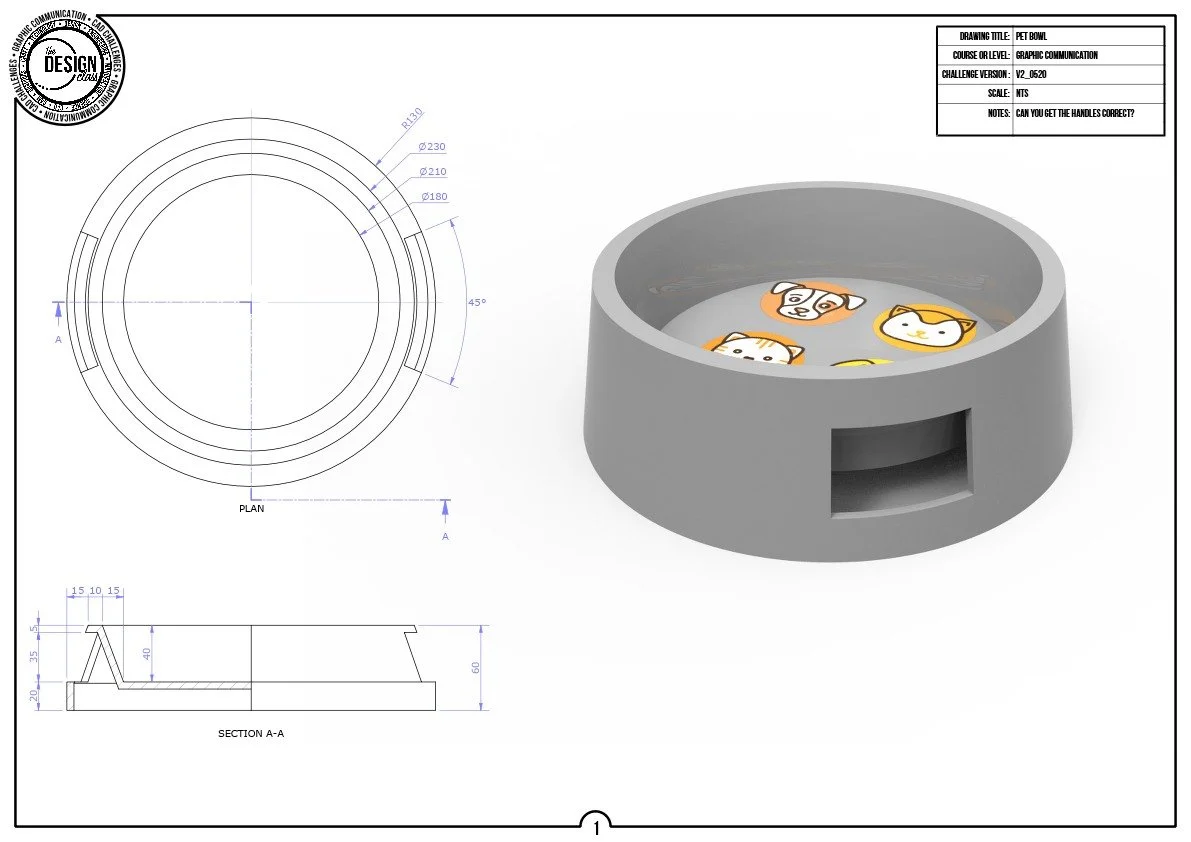
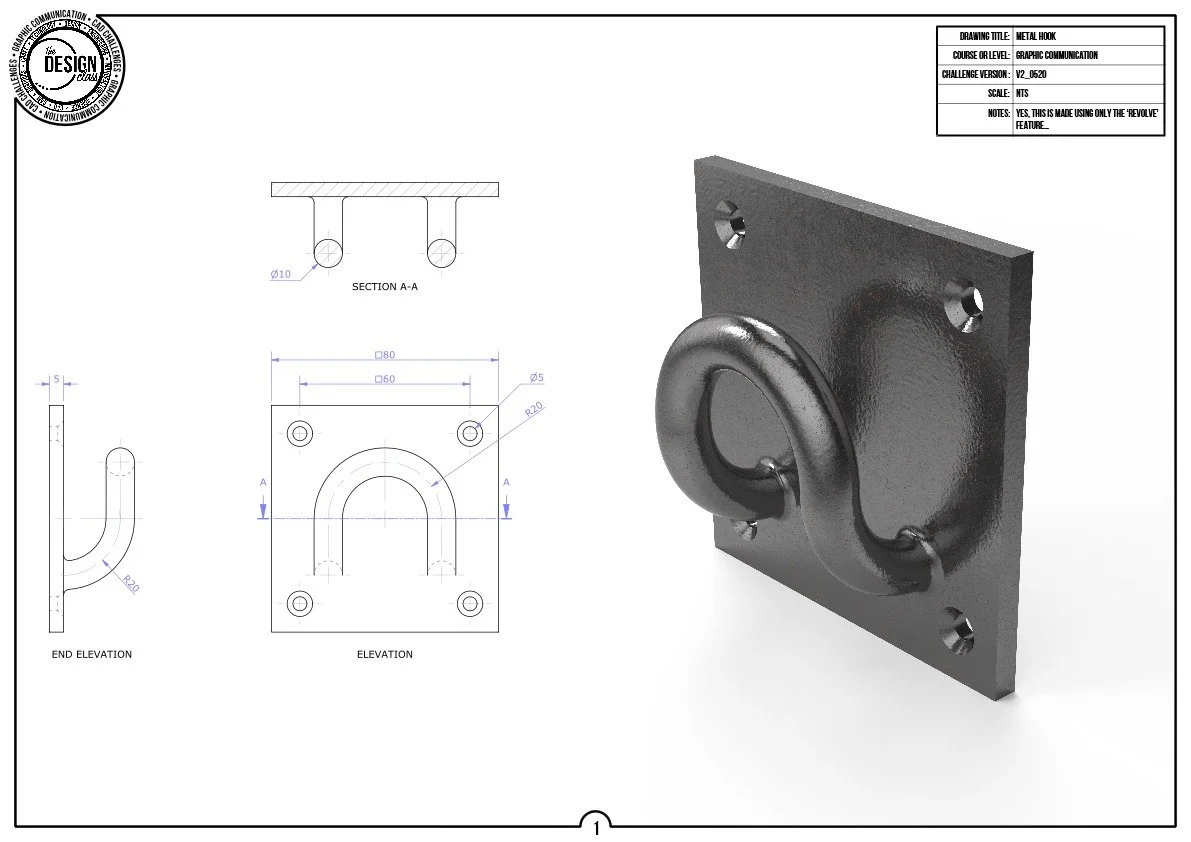
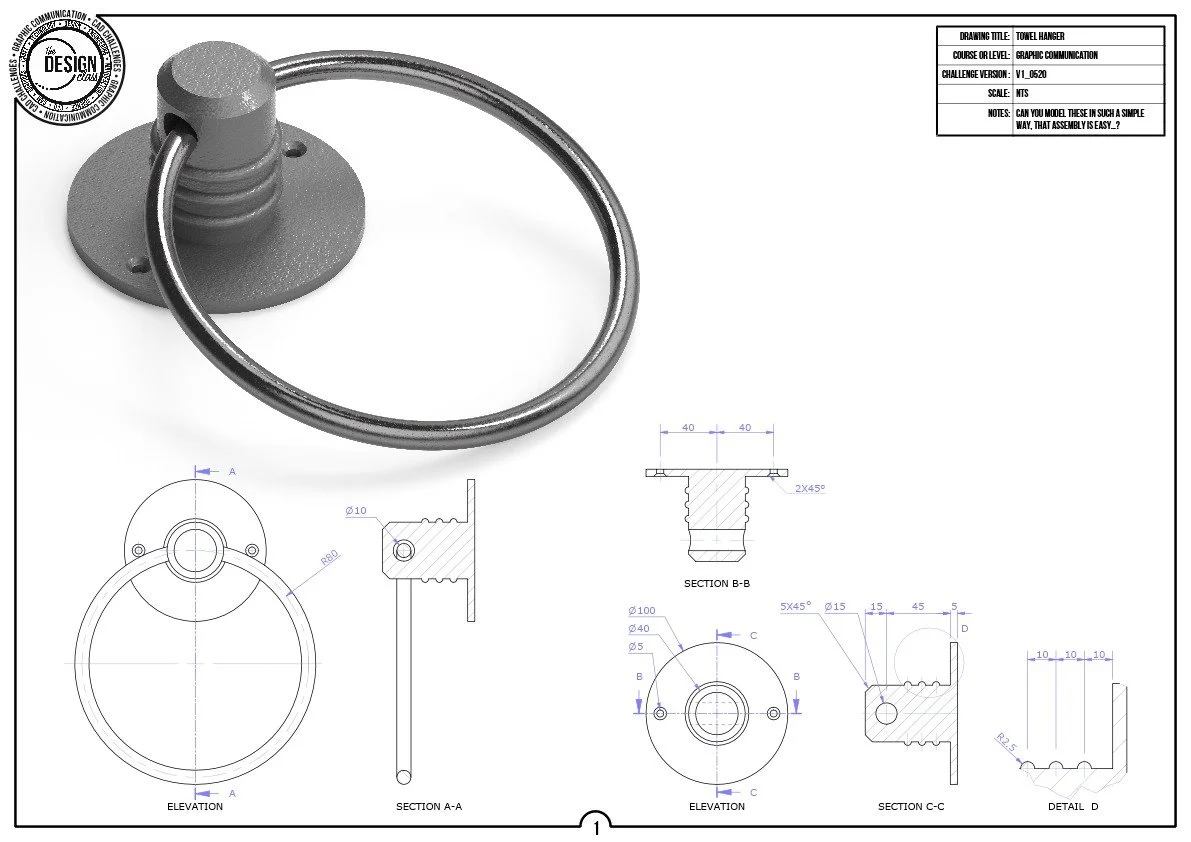
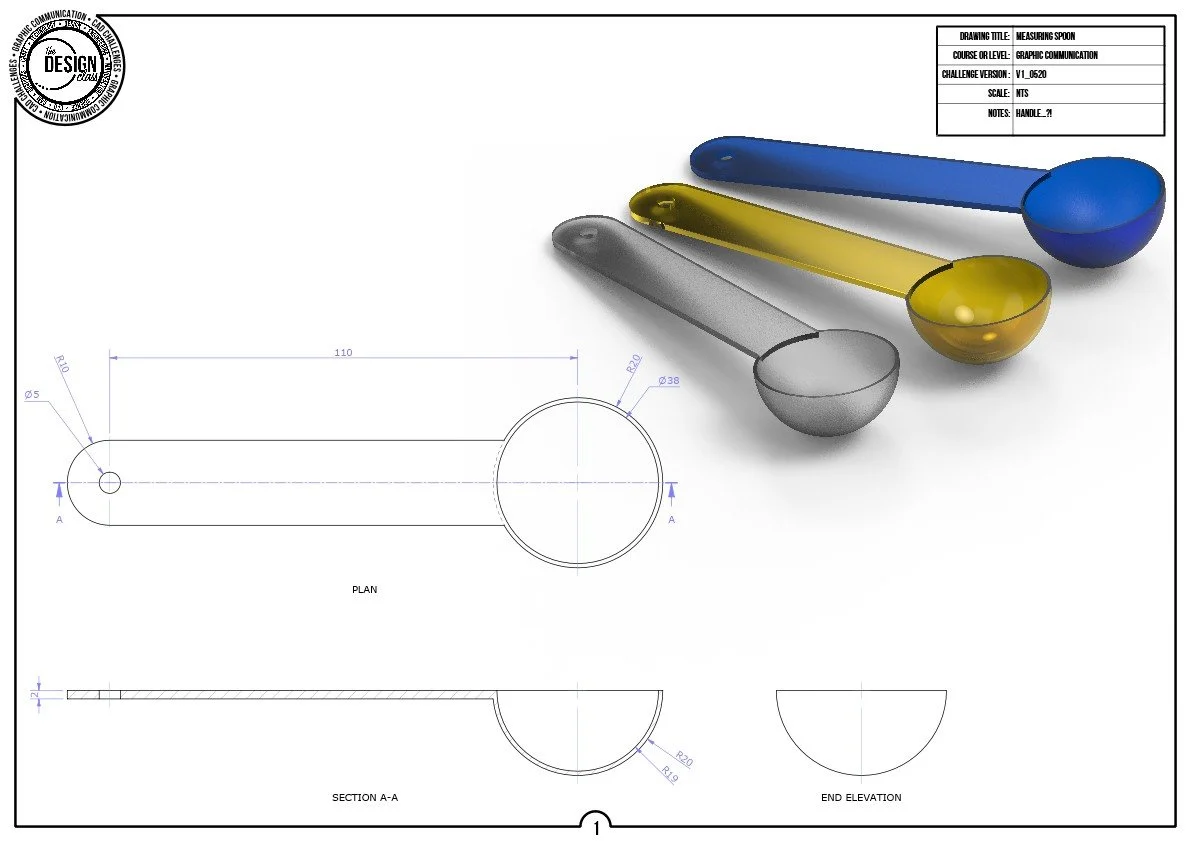
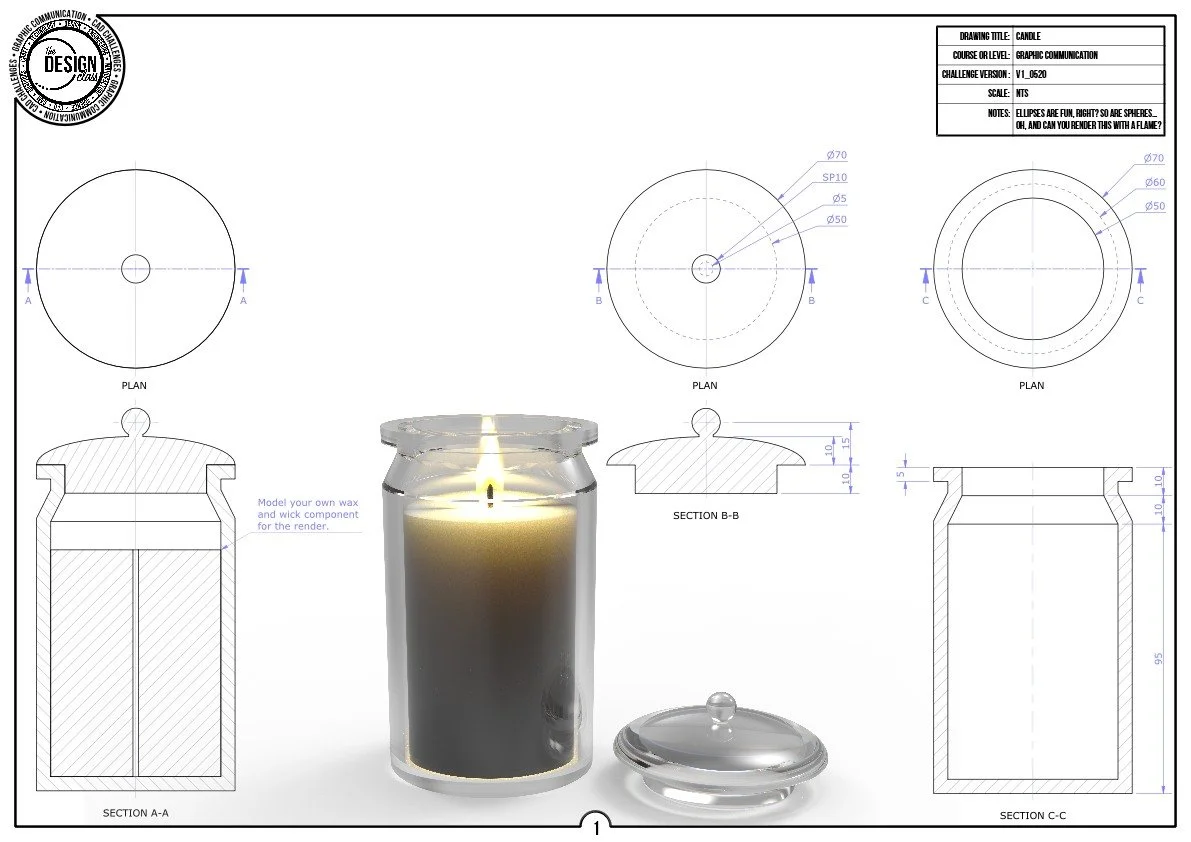
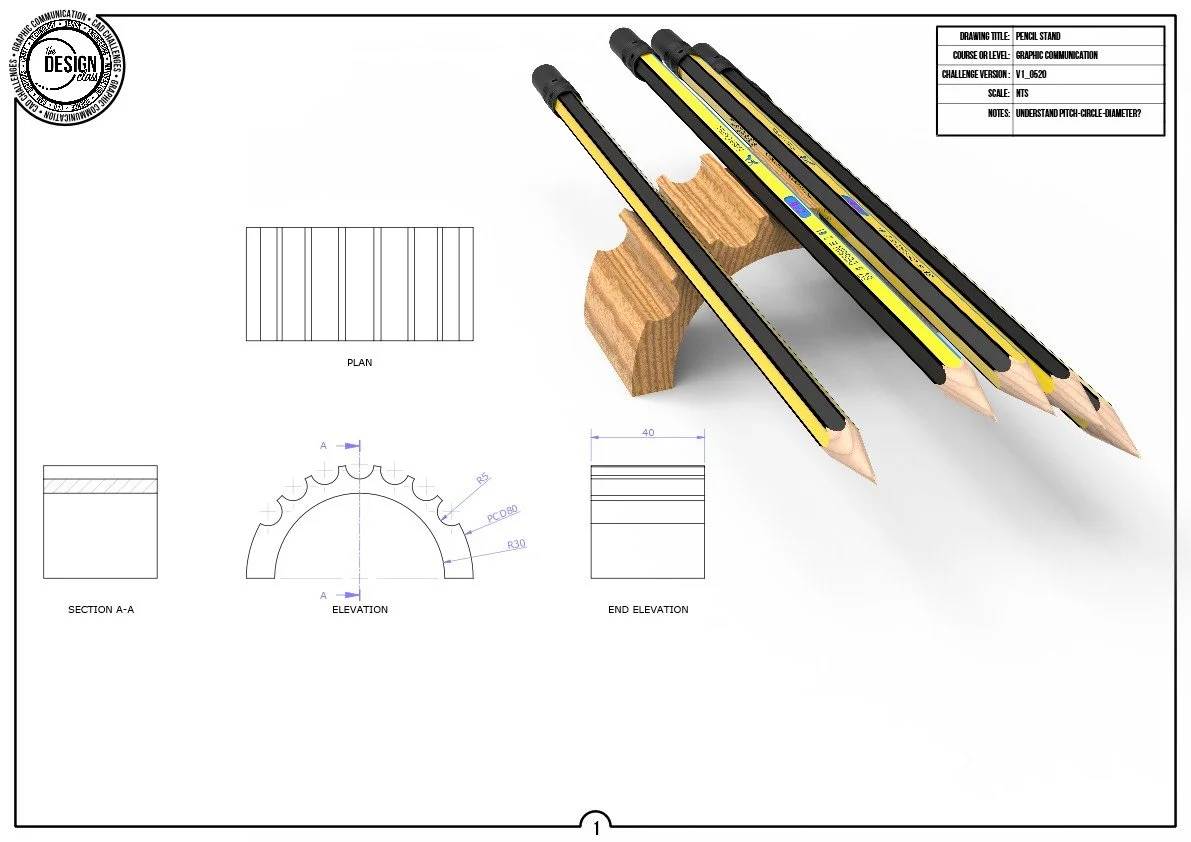
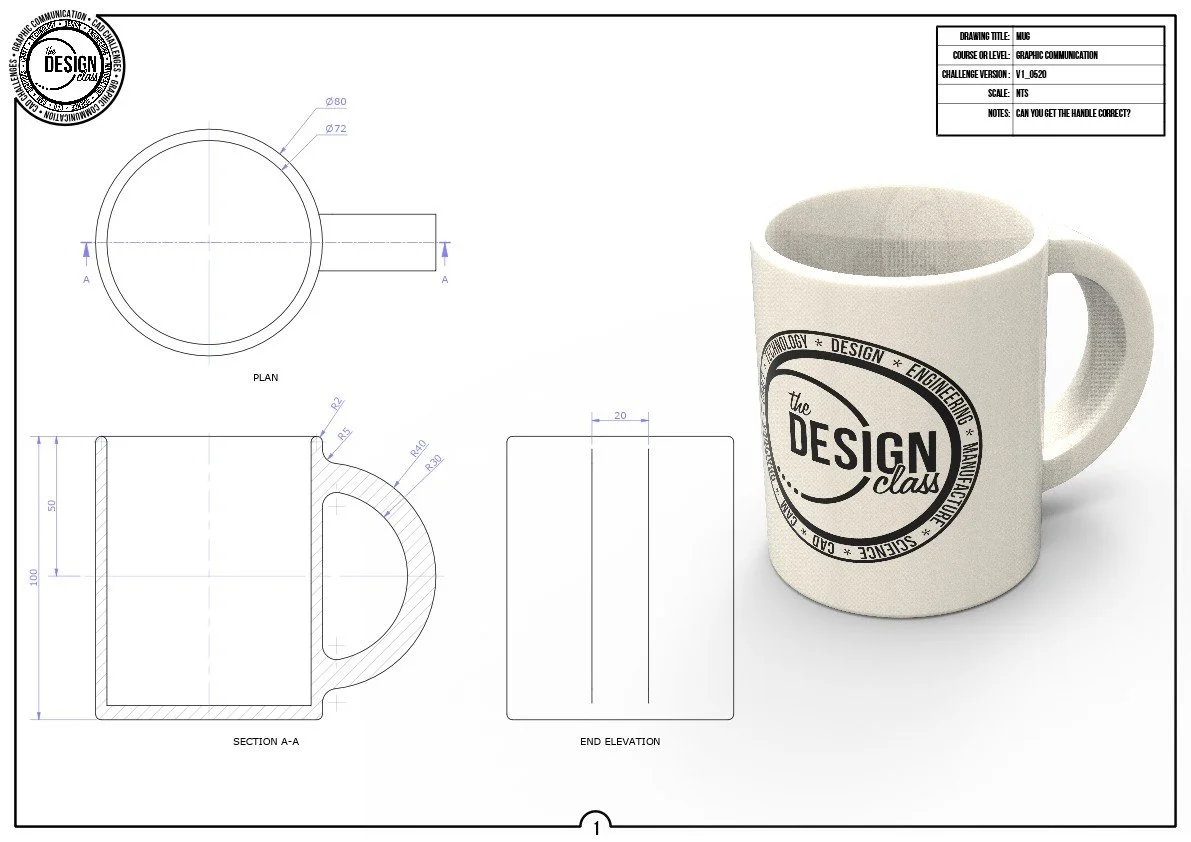
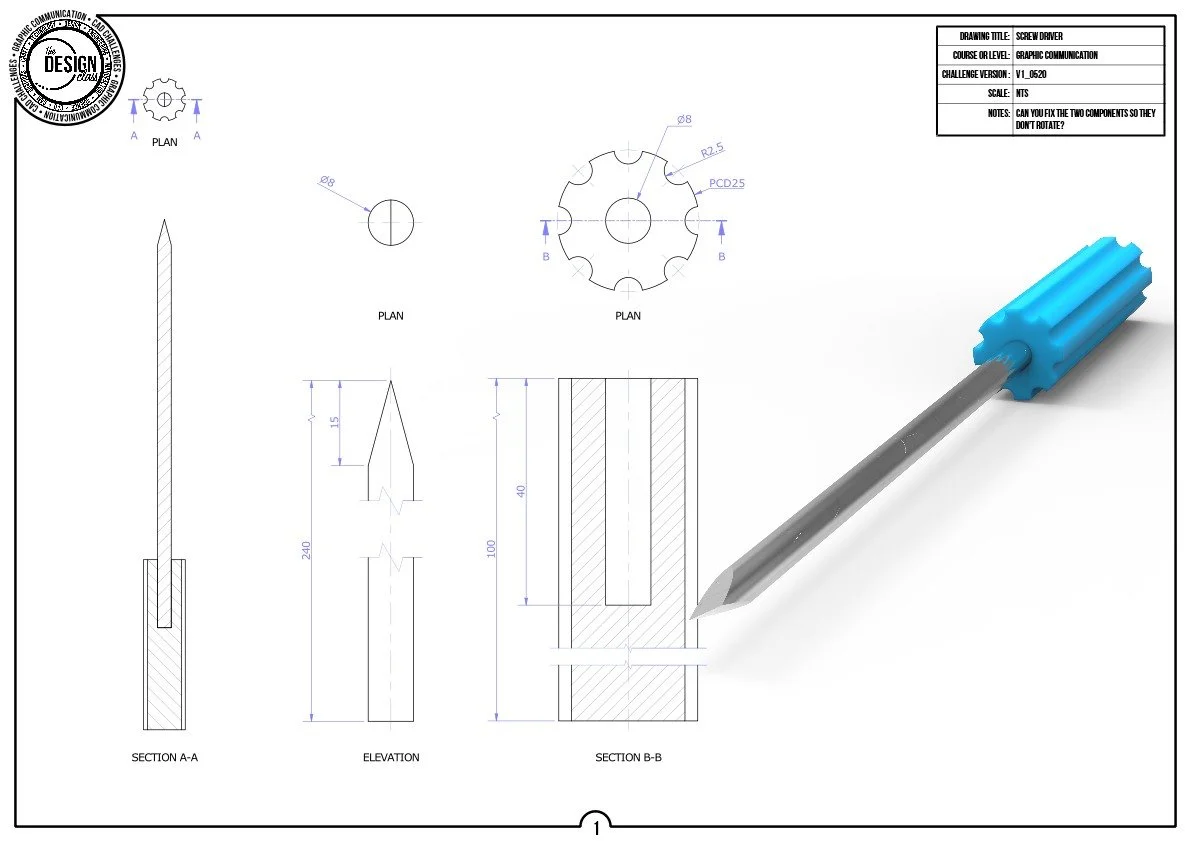
These CAD challenges develop confident use of the Revolve tool through accurate sketching and controlled profile creation.
You will rebuild each model from the supplied drawings, focusing on centre‑lines, symmetry, constraints and precise dimensions. By revolving profiles to form complex curved solids, you learn how rotational geometry underpins many real‑world products.
The challenges strengthen core modelling skills and prepare you for more advanced parametric techniques.